Quantcast
Channel: Dotnet/C# – Xinyustudio
Viewing all 204 articles
Browse latest View live

How to use WPF AvalonWizard control (I)

$
0
0

The AvalonWizard control is a handy WPF wizard control. To use it in your project, follow below procedures:

1. In your project, add a reference to the AvalonWizard assembly. You can right click the reference folder, and select “Manage NuGet Packages”, and download the package using NuGet.

image  image

2. Create a new window, and in the XAML file, add below markup:

image

and your designer should look like this:

image

3. Add some WizardPages in the markup:

image


and your designer should look like this:

image image


Tips: If your designer does not update after adding the above XAML lines, try to edit the PageIndex as shown below, and change it from 0, for instance, to 1 or whatever… This will update the designer view.

image

By changing the PageIndex in XAML, you can switch to different pages at design time, then drag the WPF controls in the designer or XAML code.

image


Filed under: Dotnet/C# Tagged: AvalonWizard tutorial example

How to use WPF AvalonWizard control (II): Adding event handlers

$
0
0

In my previous post, we have discussed on how to get started with AvalonWizard. Yes, we need do sth else to make it work for our project. In this post, I will demonstrate how to add some logic to accomplish this.

The first example is to config the behavior when the Cancel button is clicked and this is quite easy:

image

In the code-behind file, add the corresponding event handler:

image

The next example is a little bit complex, and we wish the “Next” button changes to “Finish” button if the checkbox “Create an empty project” is clicked.

image  image

To accomplish this, we can hook the Checked/Unchecked event handler and set the FirstPage.IsFinishPage property. Emm, it works!

image


Filed under: Dotnet/C# Tagged: AvalonWizard tutorial example event handling

Multi-cursor of Sublime Text Editor, Box Selection, Multi-Line Editing with VS 2010

Remove unused languages/cultures from WPF/silverlight applications

$
0
0

If you ever used Microsoft Blend to open your WPF applications, you will find that in the output folder there are some satellite dlls in the form of fr, de, zh etc. To remove these unused languages from your output,  you can remove below two references from your project:

image

Rebuild the project, yeah!

The original solution can be found here, and credits go to paopaop.


Filed under: Dotnet/C# Tagged: blend, culture, de, fr, language, wpf, zh

Visual Studio 2010, 2012 Very slow and the solution

$
0
0

I have installed VisualStudio 2010 for quite some time but suddenly it becomes very, very slow, and opening a project with dozens of files will take over 3-4 minutes, but it used to work very fast, on the same computer, the same os …

I suspect that there might be some conflict since I had installed 2012 version as well. But it turns out that this is not the cause of the poor performance.

After googling, I then find the solution here: delete all the folders named “Temporary ASP.net” on your computer.

There is a good tip to get where these folders are located. Use Everything search (free tools) and search with the keyword “Temporary ASP.net”, it will output all the folders on your PC instantly, as shown in the below snapshots. Delete all these folders, typically beneath Microsoft.Net\ folder.

image

Start VS and enjoy.

BTW: This also solved another problem for my VS: copy and cut is extremely slow, whereas paste is fine. After deleting these folders, all works fine!


Filed under: Dotnet/C# Tagged: visual studio slow very slow ultra slow startup slow troubleshooting 2010 2012

WPF Tooltip control: Tips & Tricks

$
0
0

1. How to add multi-line tooltip?
For button control, you can wrap the tooltip string in a TextBlock element, and then use either <LineBreak/> or &#x0a in the tooltip string.

image  image

image  image


If you set the tooltip using code, you can directly use “\n” in the tooltip text, :

image 

image

image

2. How to add bolded texts to the tooltip?
Use <Run> element.

image     image 

3. How to add images to the tooltip?
Use <InlineUIContainer> and <Image> elements.

image  image


Filed under: Dotnet/C# Tagged: bold text, example, how to, image, multi line, tooltip, tricks, tutorial, wpf

Create Solidworks addin in Visual Studio 2012

$
0
0

Up to now, Solidworks had released its 2013 sp2.0 version, and its API is updated to v21.2.0.50, but once you installed the API, you will not see the addin wizard appear in Visual Studio 2012.

One tricky way to trouble shoot this is:

  • Create a SolidWorks addin project in Visual Studio 2010
  • Open it the project in VS2012.

    image  image

Done!


Filed under: CAD, Dotnet/C#

Rhino C# Development (I) : Get Visual Studio Wizard ready

$
0
0

1. Go to http://www.rhino3d.com/new/dev to download the SDK. Unzip the file, and you will see 4 files:

image

2. Unzip the file “Rhino4DotNetWizards.zip”, and you will see two files

image

Double click on the RhinoWizards.vsi file. This is a Visual Studio installer file that will copy the wizards to the appropriate locations on your computer.

image

Once the wizard is installed to Visual Studio, you can find them in the VS wizard when you create a new project. Note however that:

  1. This RhinoWizards.vsi file is for Rhino 4 development, and works better in VS2005 and VS2008.
  2. If you are developing under Rhino 5, it is recommended that you download the New project wizards (RCPackage.vsix) for plug-ins and commands in Visual C# 2010 and Visual Basic 2010. For more information, click here.

For VisualStudio 2010, you can double click the RCPackage.vsix dowloaded from (2), and below shows the result after installing the new addin wizard for Rhino 5:

image

However, you might NOT find it in Visual Studio 2012! To trouble-shoot this problem, you can download this updated VSIX file for both VS2010 and VS2012 here, or solve this manually:

  • Open the RCPackage.vsix with 7z or winrar, since the vsix file is essentially a zip file;
  • In the opened archive, edit the “extension.vsixmanifest”

 image

  • In the opened “extension.vsixmanifest” (which is xml file), duplicate the segment <VisualStudio Version=”10.0″> and change the duplicate version from 10.0 to 11.0, as shown below:

image

Save it back in the RCPackage.vsix, double click it, and now you should be able to install the addin in both Visual Studio 2010 and 2012.

image image

Visual Studio 2010

Visual Studio 2012

You are then ready to begin your Rhino development journey.


Filed under: CAD, CAX, Dotnet/C#, Programming Tagged: C#, example, Rhino, tutorial, wizard

Rhino C# Development (II) : HelloRhino

$
0
0

If you have not got Rhino Visual Studio working, see this post to get it done.

1. In Visual Studio, create a new project, in the opened dialog, type “rhino” in the upper right filter field:

image

2. Click Ok in the dialog, and a boiler plate Rhino addin project is created for you.

image

Click Finish button. Visual Studio opens the project and you can add your code then.

image image

In the Solution Explorer, you can find two C# classes are created for you, and the necessary reference “RhinoCommon” is also added to you. Lovely, Smile

Note that in development for Rhino 4, you generally need a minimum of 3 classes to get a Rhino run, which includes (plugin, command and plugin attribute), the latest RhinoCommon based Rhino development, simplified this and makes more senses and neat.

3. Let’s say hello to Rhino!

Open hello.cs, and browse to RunCommand() function, added below sentence, compile and run!

image

4. Now Rhino 5 starts. But you may find no changes, and Rhino just runs without appreciating your effort, where is your plugin?

Well, be patient. You have shaked hands with Rhino, but keep talking with her:

  • Go to menu Tools > Options
  • In the left tree view, click “Plug in”, and then in the right panel, click “Install” button
  • Browser your addin dll which is in the bin\debug folder under your project root folder now, and click “open” button to load your dll into Rhino

image image

image image

Now in the command window, type “Hello” and press enter:

image 

image

Oh, yeah! You have said hello to Rhino now!

arrow, download icon

Download Visual Studio 2010 Source project: HelloRhino.7z; or HelloRhino.zip.


Filed under: CAD, Dotnet/C#, Programming Tagged: addin, C#, CAD, example, hello world, plugin, Rhino, rhino common, tutorial, wizard

Rhino C# Development (III) : Add Winform UI to Rhino

$
0
0

Rhino C# Development (I) : Get Visual Studio Wizard ready
Rhino C# Development (II) : HelloRhino


Now that we are able to talk with Rhino, let’s add our own UI to Rhino. In Rhino 5 with RhinoCommon SDK and Rhino_DotNet, you can easily add .net Winform User Control to Rhino.

image

1. Add a reference “Rhino_DotNet.dll” to your project, this assembly is located at the same folder where Rhino.exe resides:

image

Note: after adding this reference, you should change the Copy Local property to false in the Property window of Visual Studio, otherwise, rhino will complain when you install the plugin.

image

2. In the project, add a Winform user control to the project, drag any controls from Visual Studio Toolboxes, for instance, I added a tool stripe, a label, a progress bar, a button and a group box with a few radio buttons, mine looks like below:

image

3. Open the plugin class, add a variable and type below code in the constructor, as shown inside the red rectangles below:

image

Here, we add a MRhinoUiDockBar instance (that is why we need reference Rhino_DotNet.dll) in the constructor. Note that you can generate a GUID by clicking “Tools > Create GUID” menu, and then click the copy button, as shown below.

image

4. Add an override function OnLoad to notify Rhino to load our custom designed UI on startup:

image

Now press “Ctrl + F5” in Visual Studio to fire Rhino 5, and install this plugin, you will see our .Net UI is loaded to Rhino, and your can even dock it here and there, since in the above code, we used MRhinoUiDockBar.DockStyle.any in the enumeration parameters.

image

arrow, download icon Download Visual Studio 2010 Source project: RhinoAddUI.zip; or RhinoAddUI.7z.

See also:
Rhino C# Development (I) : Get Visual Studio Wizard ready
Rhino C# Development (II) : HelloRhino


Filed under: CAD, Dotnet/C#, Programming Tagged: .net user control, customization, example, Rhino, Rhino.net, tutorial, UI, Winform

Visual Studio 2012 update: offline / standalone download

$
0
0

1. Go to this Link, to get the latest update.

image

2. Download the latest update, following the link above. Note: do not install, simply download it.

image

3. Once the package is downloaded, an iso file will be available on your hard disk. For Visual Studio 2012 update 2 or earlier, the iso won’t be built for you, and you can try below command instead:

“VS2012.2.exe /layout”

However, for VS2012 update 3, the ISO is made for you!

Enjoy and happy coding!


Filed under: Dotnet/C# Tagged: Visual studio update standalone offline iso download

C#: programmatically get and set non-unicode languages for windows OS

$
0
0

We know that we can use English version of Windows and at the same time to display non-unicode texts such as Chinese and Japanese etc. The procedures are as follows:

Control Panel > Region > Administrative Tab, and then “Change system locale” button.

image

image

But how do this using C#? This post offers my initial attempt to accomplish this task.

The settings for this non-unicode languages are kept in registry:

image

The value for the registry key HKEY_LOCAL_MACHINE\SYSTEM\CurrentControlSet\Control\Nls\Language “default” value is the hex code (LCID Hexadecimal) of the system’s non-unicode language, for commonly used LCID code, click here or this link from Microsoft for details.

For instance, “0804” is the hex LCID code for “Chinese – People’s Republic of China”.

To get or change the non-unicode languages for windows OS, we can edit this registry key value using C#, and the code snippet is like this:

image

Similarly, the code to set a specific language is then straightforward:

image

But wait, this is not all! If you calling the function:

SetSystemNonUnicodeLanguage(CultureInfo.GetCultureInfo(“zh-HK”));

you will find there is no error, no exception, and using regedit.exe shows the registry key is also changed correctly, but, if you using control panel region settings to have a look, you will find this is NOT updated. The reason is, you have to restart to make this setting take effect!

So, I created another function to restart the computer in code:

image

Great! Now call the RestartComputer() after calling SetSystemNonUnicodeLanguage(), it worked.

To save your effort, I have created a C# class SystemNonUnicodeLanguageEntry with static methods as below. Download this class here.image


Filed under: Dotnet/C#, Programming, Windows Tagged: .net, C#, control panel, get, language, Non unicode, region settings, set, system data and time

C# Command Line Parser Library Example

$
0
0

Command Line Parser Library allows CLR applications to define a syntax for parsing command line arguments. It is very easy to incorporate this library into your C# project.

To install Command Line Parser Library, run the following command in the Package Manager Console:

PM> Install-Package CommandLineParser

Create a new class called CmdOptions, where the command line arguments are model with class properties:

image   image

To consume the command line argument:

    static void Main(string[] args)
    {
           CmdOptions ops=new CmdOptions();
           bool bSuccess = CommandLine.Parser.Default.ParseArguments(args, ops);
           if (bSuccess)
              Console.WriteLine(ops.InputPhrase, ops.FontName);
           else
              Console.Write(CmdOptions.HelpInfo); //output help strings
    }

Running this app with no argument, and the result shows the help string in CmdOptions class:

image

So simple to use! Enjoy~


Filed under: Dotnet/C#, Programming Tagged: C#, cmd, command line argument, Command Line Parser Library, example, hyphen argument, parsing

Get the boundary of a mesh: the algorithm and C# implementation

$
0
0

Given a mesh, we might occasionally want to filter those internal vertices and keeps only the outline or silhouettes. But how to do that? The problem came to my mind several years ago, when the Department of Mechanical Engineering I was serving need to drive a laser cutter to trim some shapes. So I decided to refresh my mind and use it in my current project in text morphing.

So the input might be some triangulated mesh, and the output is the silhouettes, as shown below.

image  image

Looking at my past source code, I soon found the solution. Considering the below simple rectangle, where two triangles exist:

image

For two triangles <1,2,3> and <1,3,4>:

  • Step I: we first get all edges  <1,2>, <2,3>, <1,3>, <1,3>, <3,4>, <1,4>, here we use point index to refer to a vertex.
  • Step 2: We remove the internal edges, which occur more than once. In our case the edge <1,3> satisfy this.
  • Step 3: Keep only edges that occur once, we got the outline edges <1,2>, <2,3>,<3,4>, <1,4> only!

Simple, but it worked! Below is the C# Snippet:

image

Here we use a tuple to represent an edge:image

The tricky part is the EdgeComparer class, where we regard edge <1,2> and edge <2,1> as the same edge, i.e. an edge from point 1 –> point 2 is identical to an edge from point 2 –> point 1.

image

By grouping all edges according to their emergence multiplicity, we can easily filter out those “duplicate” or internal edges, and therefore external boundaries or outlines are kept.

Thanks to C#’s LINQ feature, the above algorithm is very easy to implement! Enjoy!


Filed under: CAD, CAX, Dotnet/C#, Programming

Text morphing: Rectangle to text


Visual Studio 2013 Ultimate ISO download and offline installation: troubleshooting of “incorrect function” problem

$
0
0

Visual Studio 2003 was released, with quite a few exciting features. If you wish to get the offline iso installer, click below links (official iso from Microsoft) to download.

However, even if you downloaded the ISO, and if you mount the image and run it from the virtual CD/DVD, you might get below error: “vs_ultimate.exe Incorrect function.”, as shown below:

vs_ultimate_incorrect_function

A trivial solution to troubleshoot this is:

  • Mount the iso with any virtual cd software
  • Copy the mounted content to a local folder, e.g. C:\temp\vs2013\
  • Run “vs_ultimate.exe” from the local folder

That is it. Good luck!

——————————————————————————————————-

Microsoft Visual Studio Ultimate 2013 – English
DVD5 ISO image (SHA-1: 79DBBA7B6EF12B1A4E715A7F20951EE66FBCDAB4)

Microsoft Visual Studio Premium 2013 – English
DVD5 ISO image (SHA-1: E8CFBDDC940DA1E73498BADF8F556564B583E298)

Microsoft Visual Studio Professional 2013 – English
DVD5 ISO image (SHA-1: 4C0C7B3372FE44248F1AF995DD0E9B3864657DAD)

Microsoft Visual Studio Test Professional 2013 – English Download here.

Microsoft Visual Studio Team Foundation Server 2013 – English Download here.


Filed under: Dotnet/C#, Programming, Windows Tagged: Incorrect function, installation, iso, offline, ultimate, visual studio 2012, visual studio 2013, vs, vs2013

Rhino C# Development (IV) :Using new RhinoCommon API to develop Rhino3D .net plugins

$
0
0

Rhino3D has changed its .net plugin development implementation. Although you can still use the Rhino.NET SDK to create Rhino plug-ins with the same capabilities as Rhino C++ SDK developers, however, Rhino.NET will NOT be available in Rhino 6. Rhino3D instead prefers using RhinoCommon if possible, and RhinoCommon is the new .NET plug-in SDK for Rhino 5+.

To see how to use the old Rhino.net approaches in Rhino3D plugin development, refer to my previous blogs:

  • Rhino C# Development (I) : Get Visual Studio Wizard ready
  • Rhino C# Development (II) : HelloRhino
  • Rhino C# Development (III) : Add Winform UI to Rhino


    In this blog, I am going to show how to use the new RhinoCommon API to develop .net plugins for Rhino3D.

    • Download the new RhinoCommon Plug-in SDK:

      Project wizards for plug-ins and commands are ready for Visual Studio 2010, 2012 and 2013, both in C# and Vb.Net, and including in Ultimate, Professional, Premium, C# Express, Vb Express and Windows Desktop Express where available.

      Same as installing from VS ‘Extension Manager’. After installing the wizards with the Extensions Manager, when you create a new project in Visual Studio, set the Framework to 4.0 or above in order to see the Rhino plug-in in the list.

    image

  • Fill-in the project name etc, as shown below in the wizard:

      image

    • Click Finish and wait for a couple of seconds:

      image
    • Rhino will generate the skeleton code for you to work on:

      image


    • Build the plugin in VisualStudio, or directly run it by pressing Ctrl + F5, a rhino instance will be fired:
    • Go to Rhino’s menu, Tools > Options > Plugins

    image

  •  


     image


    • Click the install button, browse to the project folder where you have created the plugins, select the compiled binary file (*.RHP), and then click the OK button.

    image

    • Run the new Rhino command you have just developed, yeah!

    image

    Happy coding and happy rhino plugin developing!


  • Filed under: CAD, Dotnet/C#, Programming Tagged: .net, C#, example, plugin, Rhino, rhino common, Rhino.net, Rhino3d, step by step, tutorial

    Rhino C# Development (V) : Create and dock Rhino Panels side-by-side

    $
    0
    0

    In my previous blog Rhino C# Development (III) : Add Winform UI to Rhino, I demonstrated how to create a dock bar with Winform User controls in Rhino3D.

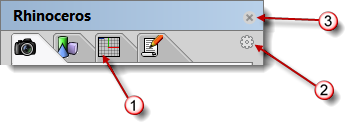
    In this blog I am to demonstrate how to use a similar approach to create Rhino panels, and then dock the panels side-by-side. Rhino panels, are tabbed containers where collection of controls can be hosted, as shown below.

    tabbedpanel-001.png

    To create such a panel, in Visual Studio, add a user control in the plugin project. If you don’t know how to create such a plugin project, refer to my previous blogs for details.

    In this example, a UserControl called GeometryPanel is inserted into the project, and a few simple winform controls are added for illustrative purposes. Add a Guid attribute to the UserControl, as shown below.
     image

    [System.Runtime.InteropServices.Guid("0b0c3a6e-7efb-47c9-b2e3-7d92788a9f74")]
    public class MyPanelCommand : Command
    {
        public MyPanelCommand()
        {
            Instance = this;
        }
    }


    Next, in the rhino command class, add below code lines:

    protected override Result RunCommand(RhinoDoc doc, RunMode mode)
    {
        var type = typeof(GeometryPanel);
        Rhino.UI.Panels.OpenPanel(type.GUID);
        return Result.Success;
    }

    Build and Run. You will see nothing if your run your command in Rhino3D. Fear not. We missed an important step: to register this panel with Rhino! In the rhino plugin class, in the constructor function, add below code lines:

    public MyPanelPlugIn()
    {
        Instance = this;
        Rhino.UI.Panels.RegisterPanel(this, typeof(GeometryPanel), Geometry,
            P
    roperties.Resources.Geometry);
    }

    Rebuild and run! Yeah! When we run the command, we can see our user control based panel inside Rhino3D!

    image

    OK, let’s walk one step further. Let’s dock our panel side by side with Layers Panel, to do so, modify the RunCommand function above as follows:

    protected override Result RunCommand(RhinoDoc doc, RunMode mode)
    {
        var type = typeof(GeometryPanel);
        //Rhino.UI.Panels.OpenPanel(type.GUID);
        Rhino.UI.Panels.OpenPanelAsSibling(type.GUID, PanelIds.Layers);
       
    return Result.Success;
    }

    Here, we used another static field PanelIds.Layers, which refers to the Guid of the Layers panel, and indicating that we wish to dock our custom panel with the Layers panel.

    image

    That is it! Happy coding!


    Filed under: CAD, Dotnet/C#, General Tagged: .net, C#, dock, panel, Rhino, rhino common, Rhino.net, Rhino3d, side by side, user control, Winform

    Extending Unigraphics NX using C# (IV) : Recording journals

    $
    0
    0

    The concept of journaling is similar as the recording macros in SolidWorks. Before clicking the record journal button on the Jorunal Toolbar:

    UG_Record_Macro_3

    Do the following:

    UG_Record_Macro  UG_Record_Macro_2

    Then start recording journals, click the desired buttons or menu items to perform the expected actions, and then stop recording, edit the journal:

    and you can get the scripts easily then:

    UG_Record_Macro_4

    Enjoy coding!


    Filed under: CAD, Dotnet/C#

    Using .Net object in Matlab

    $
    0
    0

    Matlab ’s function is power, but not enough. Sometimes, you need some functionality from .net. One example is the Bezier curve class, which is absent in Matlab.

    In this example, I created a C# class called BezierCurve:

    Use.Net_A

    I would like to use this class in Matlab, and below are the procedures:

    1. Created a new .Net class library, I call this BezierLib;
    2. Add the class into the assembly;
    3. Compile and get the “BezierLib.dll” ;
    4. In Matlab Command or script file:
    5. BezierLibInfo = NET.addAssembly(‘C:\Temp\BezierLib.dll’);
      B=BezierLib.BezierCurve([0,1,2,3,4,5],[0,1,2,3,4,5]);  % Constructor
      B.EvalVaueAt(3);  % Call functions;

    That is it.


    Filed under: Dotnet/C#, Maths
    Viewing all 204 articles
    Browse latest View live